


MacBook Pro Keyboard Conversion Kits

Understanding MacBook Pro Conversion Kits
Why Keyboard Layouts Differ
When buying a MacBook Pro, the keyboard layout is tied to the region where it was sold. For many users, this creates frustration. For example, some people import laptops from abroad. Others choose refurbished or second-hand devices, which often include the wrong keyboard language. In these situations, a MacBook Pro keyboard conversion kit offers a simple and reliable solution.
What This Guide Covers
This article explains what a conversion kit is, how it works, and the main benefits. In addition, it shows what a kit can and cannot do, so you know exactly what to expect. If you want to change your MacBook Pro keyboard layout—for instance from German to UK, French to US, or Spanish to English—this guide provides everything you need to make the right choice.
What Is a MacBook Pro Keyboard Conversion Kit?
A MacBook Pro conversion kit contains replacement keycaps designed for a specific MacBook model and keyboard type. Instead of replacing the entire keyboard assembly, you only replace the keycaps. As a result, the process is quicker and more affordable. After installation, the keyboard visually matches the new layout you prefer. Furthermore, by updating the input source in macOS, the physical and software aspects stay aligned. You can read Apple’s own guide to input sources for more detail.
Choosing and Using a Conversion Kit
Why Choose a Conversion Kit?
Many MacBook owners prefer a conversion kit instead of stickers or external keyboards. The reasons are straightforward. First, using a familiar layout improves typing speed and accuracy. Second, certain languages require unique characters not available on other layouts. Third, a common local layout makes resale easier and often increases value. In addition, many refurbished or second-hand laptops come with non-local layouts. Finally, conversion kits are cost-effective because replacing keycaps is far cheaper than replacing the entire top case. For a full selection, you can browse our layout conversion kits.
What a Conversion Kit Can Do
- Replace the printed legends on your keys
- Improve the look and feel of your keyboard
- Work seamlessly with macOS input settings so the characters typed match the printed symbols
What a Conversion Kit Cannot Do
- Change physical standards. You cannot switch between ISO, ANSI, and JIS layouts using keycaps alone. The MacBook’s top case dictates the physical shape, such as the tall Enter key in ISO compared with the wide Enter key in ANSI.
- Fix hardware issues. If the keyboard mechanism fails, you must replace the full assembly. The iFixit MacBook Pro keyboard repair guide illustrates the complexity of that process.
Final Thoughts
A MacBook Pro keyboard conversion kit is often the most practical way to change your keyboard layout without replacing the entire top case. By swapping the keycaps and adjusting macOS input settings, you can transform a foreign layout into one that feels natural, looks correct, and supports faster typing. In conclusion, a conversion kit provides a straightforward and affordable option that restores usability and adds long-term value to your MacBook Pro. You can use our layout conversion kits finder here.
How to Replace MacBook Keycaps: A Step-by-Step Guide for Beginners
If you’re a MacBook user, you know how much you rely on your keyboard. Whether you’re typing up work documents, chatting with friends, or simply browsing online, it’s one of the most-used parts of your laptop. But like anything that gets daily use, keyboard keys can start to wear out, stick, or even pop off.
The good news? You don’t need to replace the entire keyboard. In most cases, you can replace individual keycaps at home with just a few tools and a bit of patience.
This guide is designed for beginners. Follow these steps and you’ll have your MacBook looking and feeling like new again.
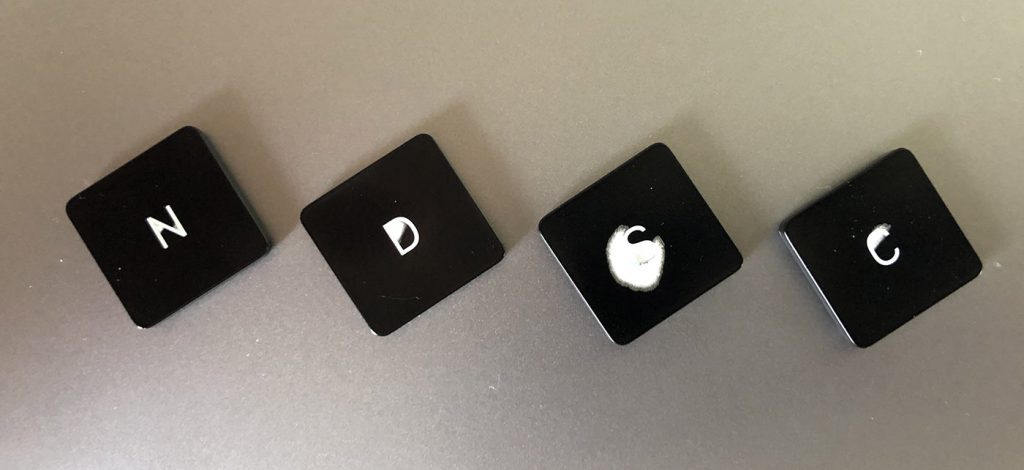
What Is a Keycap?
A keycap is the physical part of a key that your fingers touch. Beneath each one is a hinge mechanism and a rubber or silicone dome that registers your key press. Apple has used different hinge styles over the years—most notably the scissor switch (used on most models) and the controversial butterfly switch (found in models from 2015 to 2019).
The good news is: no matter the mechanism, the basic steps for replacing a keycap remain roughly the same. You just need to be a bit more delicate if you’re dealing with a butterfly-style keyboard, which is known for being more fragile.
What You’ll Need
-
Replacement keycaps designed for your specific MacBook model. Use the key finder form found on our homepage to find the correct key for your MacBook.
-
A key remover tool (or any other thin plastic tool).
-
A soft cloth, brush or compressed air to clean under the keys.
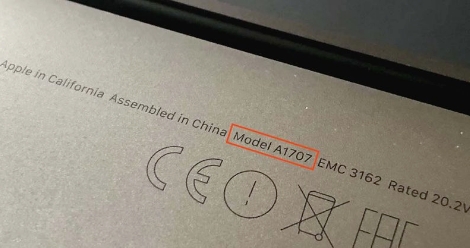
If you’re unsure of your MacBook model number, you can find this amongst the small print text on the bottom casing of your device and it will look something like A2442 in the format AXXXX.
Step 1: Identify Which Keys Need Replacing
Take a look at your keyboard. Common signs that a keycap needs replacing include:
-
Faded or worn lettering
-
A sticky or uneven feel when pressed
-
Keys that pop off or won’t stay attached
-
Visibly damaged plastic
Step 2: Buy the Correct Replacement Keycaps
This is the most important part. Apple’s key designs vary slightly depending on model and year.
Step 3: Gently Remove the Damaged Keycap
Start by powering off your MacBook to avoid accidental key presses.
Use your plastic tool to carefully lift the keycap from the corner. If you’re working with a butterfly keyboard, be especially gentle – the hinges underneath are thin and prone to snapping.
Our video guide for Scissor Switch Keyboards
For most regular, square alphanumeric keycaps, the key should lift from the bottom right corner with a light pop. However, this will vary for the other shape keycaps. Watch our instructional video guide on how to replace every single keycap:
Our video guide for Butterfly Keyboards
For most regular, square alphanumeric keycaps, the key should lift from the bottom right corner with a light pop. However, this will vary for the other shape keycaps. Watch our instructional video guide on how to replace every single keycap
Avoid using metal tools like screwdrivers unless you’re experienced, as they can scratch the casing or damage the hinge.
Step 4: Check the Hinge Mechanism
Once the keycap is off, inspect the hinge. If it’s intact and still clipped in place, great – you can go ahead and install the new keycap. If the hinge has popped off or looks broken, you may need to replace it as well (all of our keycap replacements come with the clip too!).
The hinge typically clips in at four points. If you’re replacing it, use tweezers or a steady hand to line it up properly before pressing it into place.
Step 5: Install the New Keycap
Line the new keycap up over the hinge. Once you’re sure it’s in the correct position:
-
Press gently but firmly in the centre.
-
You should hear a light click.
-
Press around the edges to make sure it’s seated evenly.
Test it by tapping lightly—it should feel just like the surrounding keys.
Step 6: Clean Up and Test
While you’ve got the key off, it’s a great time to give the area a quick clean. Use a soft brush or a can of compressed air to remove dust and debris. Once everything’s back in place, turn on your MacBook and test the replaced key(s) in a document or browser.
Final Tips
-
Be gentle. Most issues with key replacement come from forcing things.
-
Don’t rush. If a key doesn’t clip in properly at first, try again rather than pushing harder.
Conclusion
Replacing a keycap on your MacBook is one of the simplest hardware fixes you can do yourself. It takes just a few minutes and can make a huge difference to your typing comfort. Whether you’re restoring a single key or refreshing your whole keyboard, this process can save you time, money, and hassle.
If you’ve been putting off a repair, now’s the time to dive in. You might just surprise yourself with how easy it is.
If you find yourself in need of Apple replacement keycaps, look no further than Mac Replacement Keys. They are the best place online to purchase high-quality replacement keycaps for your Apple laptop keyboard.
One of the reasons why Mac Replacement Keys stands out is their excellent customer service. They are dedicated to providing exceptional service and ensuring that their customers are satisfied with their purchases. Their team of experts is always available to answer any questions you may have and help you find the right replacement keycaps for your laptop model.
In addition to their great customer service, Mac Replacement Keys has exceptional reviews and customer satisfaction. They have a 5-star rating on Trustpilot and countless positive reviews from satisfied customers. Customers praise the company for their fast shipping, high-quality products, and excellent customer service.
When you order from Mac Replacement Keys, you can rest assured that you are getting the best possible replacement keycaps for your Apple laptop. They offer a wide range of replacement keycaps for all MacBook models, including the butterfly clip and scissor clip designs. They use high-quality materials to ensure a perfect fit and optimal functionality.
Another great feature of Mac Replacement Keys is their easy-to-use website. You can easily find the replacement keycaps you need by searching by laptop model or keycap type. They also offer instructional videos to guide you through the replacement process.
In conclusion, if you need Apple replacement keycaps, Mac Replacement Keys is the best place to shop online. They offer excellent customer service, exceptional reviews, and a wide range of high-quality replacement keycaps. You can trust them to provide you with the best possible replacement keycaps for your Apple laptop.
Your Apple laptop’s keyboard is one of the most important and frequently used components of the device. However, it’s also one of the most susceptible to damage from spills, dust, and debris. One simple solution to protect your keyboard and keycaps is to use a keyboard cover. Here are some benefits of using a keyboard cover for your Apple laptop:
- Protection from spills: Accidental spills can cause irreversible damage to your keyboard and keycaps. A keyboard cover can protect your keyboard from liquid spills and prevent damage to the internal components.
- Protection from dust and debris: Dust and debris can accumulate on your keyboard and cause issues with key responsiveness and performance. A keyboard cover can protect your keyboard from these particles and keep it clean.
- Increased lifespan of your laptop: By protecting your keyboard and keycaps, you can prolong the lifespan of your laptop and avoid costly repairs.
- Improved hygiene: Keyboards can harbor bacteria and germs, especially if you frequently use your laptop in public spaces. A keyboard cover can help prevent the spread of germs and promote better hygiene.
- Customization options: Keyboard covers come in a variety of colors and designs, so you can personalize your laptop and make it stand out from the rest.
When choosing a keyboard cover, make sure to select one that is specifically designed for your MacBook model. This will ensure a perfect fit and proper coverage for your keyboard and keycaps.
In addition to using a keyboard cover, it’s also important to regularly clean your keyboard to maintain its performance and longevity. Use compressed air or a soft-bristled brush to remove dust and debris, and use a microfiber cloth dampened with a small amount of rubbing alcohol to sanitize the keys.
In conclusion, using a keyboard cover is a simple and effective way to protect your Apple laptop’s keyboard and keycaps from damage and improve its overall lifespan. Plus, it’s an easy way to add a personal touch to your device. Consider investing in a keyboard cover for your MacBook to keep it looking and functioning like new.